Team Project (tP):
Week 10 [Fri, Mar 19th] - Project
tP: v1.3
- Smoke-test CATcher During the lecture counted for participation
- Deliver v1.3
- Update user docs Thu, Mar 25th 2359
- Release as a jar file Thu, Mar 25th 2359
- Wrap up v1.3
tP: v1.3
1 Smoke-test CATcher During the lecture counted for participation
- This activity is compulsory and counts for
3participation points. Please do it before the weekly deadline.
Some background: As you know, our i.e., Practical ExamPE includes peer-testing tP products under exam conditions. In the past, we used GitHub as the platform for that -- which was not optimal (e.g., it was hard to ensure the compulsory labels have been applied). As a remedy, some ex-students have been developing an app called CAT stands for Crowd-sourced Anonymous TestingCATcher that we'll be using for the PE this semester.
This week, we would like you to smoke-test the CATcher app to ensure it can run in your computer.
The steps for smoke-testing CATcher:
There are two versions of CATcher:
- The Web version - this will be the default option
- The desktop version - this will be used as a fallback in case we run into any problems with the Web version.
You need to smoke-test both versions even if the Web version is working for you. The reason is, the Web version can still fail during the actual PE due to GitHub API restrictions. In that case, you should have the desktop version ready-to-use.
Step 1: smoke-test the Web version
- Go to the CATcher Web version at https://catcher-org.github.io/CATcher/ using the same computer (i.e., not a mobile device) that you plan to use for the practical exam.
- Use a common browser such as Chrome, Edge, Firefox, Safari
- Allow popups from https://catcher-org.github.io/
- If you encounter other problems at the app launch, refer to the Notes on using CATcher.
- Login: Choose the session
TIC4002 Alpha Test, and submit.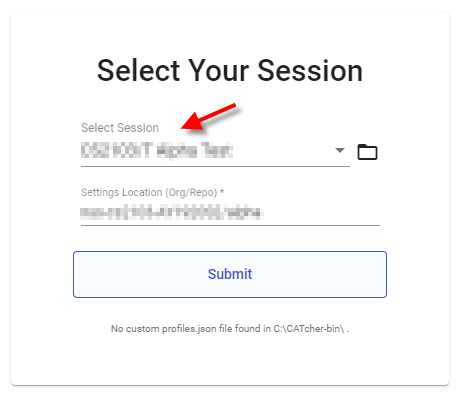
- In the next screen, login to CATcher using your GitHub account.
If the app asks for public repo access permissions, grant it (just go with the default settings). - Let CATcher create a repo named
alphain your GitHub account, when it asks for permission. That repo will be used to hold the bug reports you will create in this testing session. - Use the app (not the GitHub Web interface) to create 1-2 dummy bug reports. The steps are similar to how you would enter bug reports in the GitHub issue tracker. Include at least one screenshot in one of those bug reports.
you can copy-paste screenshots into the bug description.
You can use Markdown syntax in the bug descriptions.
Theseverityandtypelabels are compulsory. - Report any problems you encounter at the CATcher issue tracker.
- Do NOT delete the
alpharepo created by CATcher in your GitHub account (keep it until the end of the semester) as our scripts will look for it later to check if you have done this activity.
Step 2: smoke-test the Desktop version
- Download the latest version of the CATcher executable from https://github.com/CATcher-org/CATcher/releases.
- Launch the app. Allow the app to run if there are security warnings (e.g., for Win 10, click the
More Infolink in the security warning and chooseRun anyway).
If the app is blocked by your virus scanner, put it in a new folder and add the folder to the exclusions list of the virus scanner.
If you encounter other problems at the app launch, refer to the Notes on using CATcher . - Login as before, and add 1-2 new dummy bug reports.
- Do NOT delete the CATcher executable you downloaded either; you will need it again later.
2 Deliver v1.3
- Deliver the features that you planned for v1.3.
3 Update user docs Thu, Mar 25th 2359
- Update the v1.3 user guide to match the current version of the product. Reason: testers will need to refer to the UG during the practical exam dry run.
- Clearly indicate which features are not implemented yet e.g. tag those features with a
Coming soon. - For those features already implemented, ensure their descriptions match the exact behavior of the product e.g. replace mockups with actual screenshots
- Clearly indicate which features are not implemented yet e.g. tag those features with a
- Landing page (
docs/index.md): Update to look like a real product (rather than a project for learning SE) if you haven't done so already. In particular, update theUi.pngto match the current product (tips ).
Some common sense tips for a good product screenshot
Ui.png represents your product in its full glory.
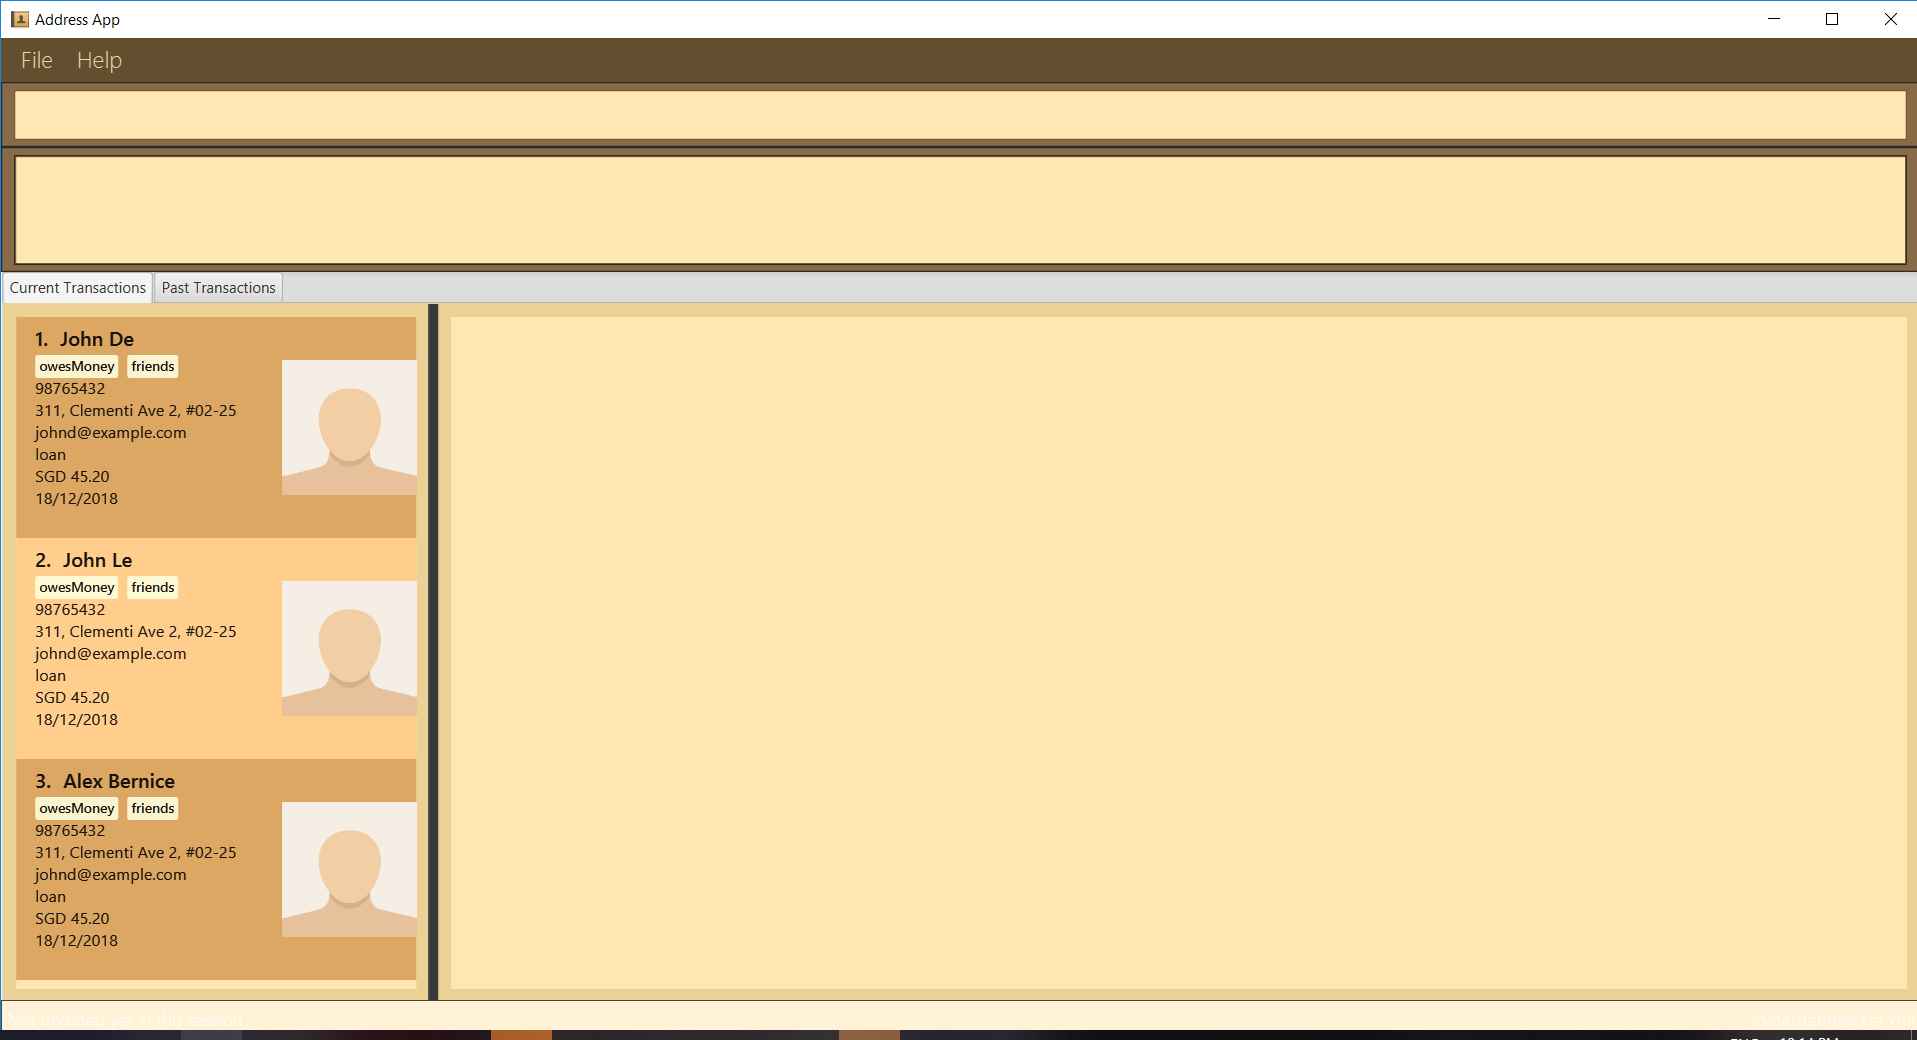
- Before taking the screenshot, populate the product with data that makes the product look good. For example, if the product is supposed to show profile photos, use real profile photos instead of dummy placeholders.
- If the product doesn't have nice line wrapping for long inputs/outputs, don't use such inputs/outputs for the screenshot.
- It should show a state in which the product is well-populated i.e., don't leave data panels largely blank.
- Choose a state that showcases the main features of the product i.e., the login screen is not usually a good choice.
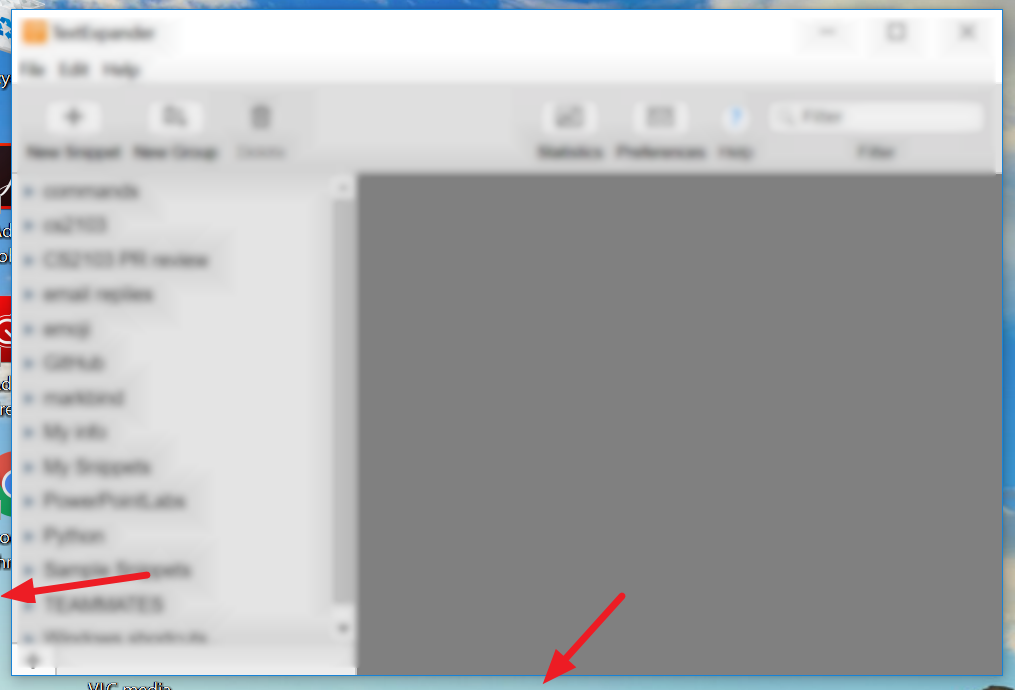
- Take a clean screenshot with a decent resolution. Some screenshot tools can capture a specified window only. If your tool cannot do that, make sure you crop away the extraneous parts captured by the screenshot.
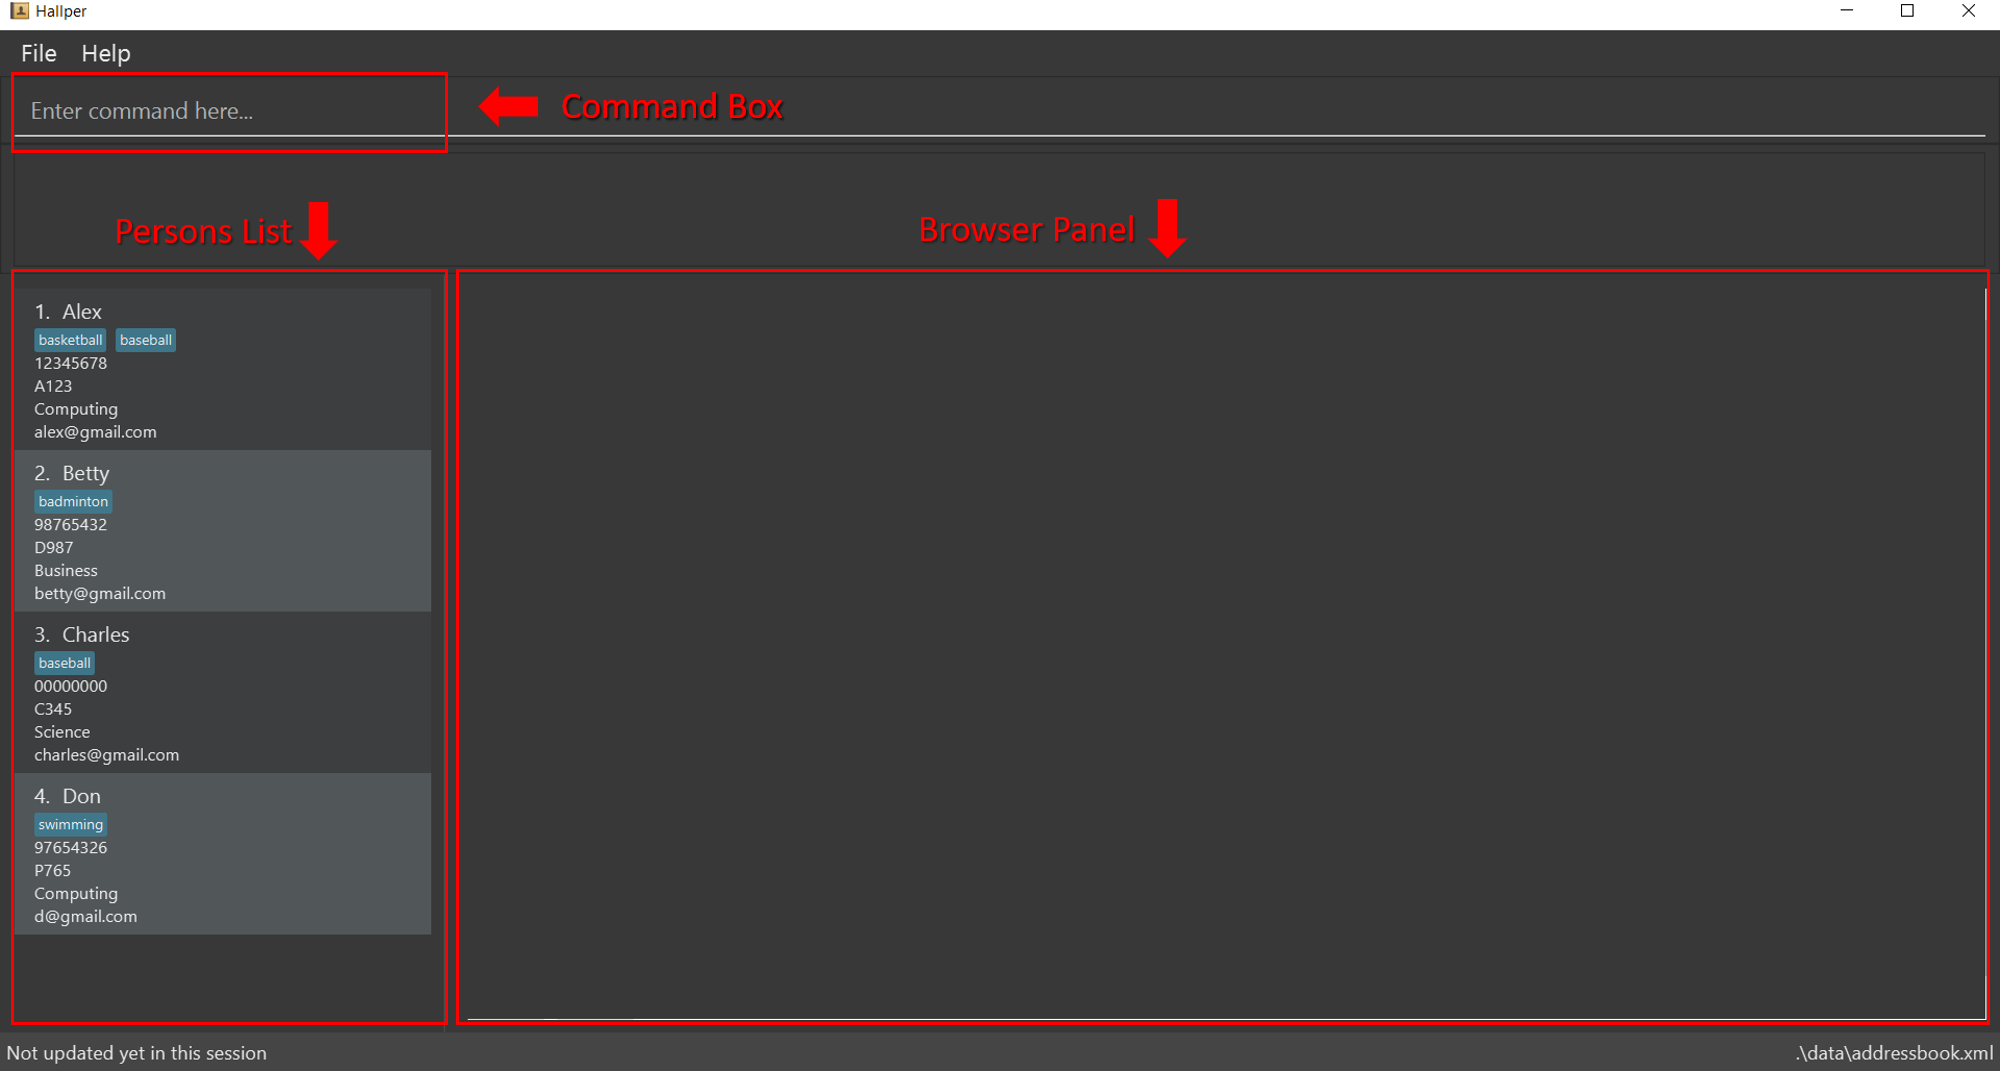
- Avoid annotations (arrows, callouts, explanatory text etc.); it should look like the product is in use for real.
Examples
Reason: Distracting annotations.
Reason: Not enough data. Should have used real profile pictures instead of placeholder images.
Reason: screenshot not cropped cleanly (contains extra background details)

Admin tP → Deliverables → User Guide
In UG/DG, using hierarchical section numbering and figure numbering is optional (reason: it's not easy to do in Markdown), but make sure it does not inconvenience the reader (e.g., use section/figure title and/or hyperlinks to point to the section/figure being referred to). Examples:
In the section Implementation given above ...
-
The main content you add should be in the
docs/UserGuide.mdfile (for ease of tracking by grading scripts). -
Should cover all current features.
Ensure those descriptions match the product precisely, as it will be used by testers (inaccuracies will be considered bugs). -
Optionally, can also cover future features. Mark those as
Coming soon. -
It is not necessary for the UG to contain every nitty-gritty detail about the product behavior. Some rarely needed information can be omitted from the UG, if the user is expected to know that information already or if the user is kept informed in other ways. For example, if a certain invalid input is unlikely to be used anyway, it is fine to not specify it in the UG, as long as the product is able to give an informative error message when that invalid input is used.
-
Beware of overusing screenshots. While it is good to have screenshots in the UG, note that they are hard to maintain. For example, if a future version changes the GUI slightly, it will require all your screenshots to be updated. Here are some tips:
- In general, don't use more screenshots than necessary.
- In some cases, you may want to crop the screenshot to show only the elements being discussed. That way, the screenshot doesn't need to be updated when other parts of the GUI is modified in a later version.
- Don't use a higher resolution than necessary as it can increase the UG file size unnecessarily.
-
Also note the following constraint:
Admin tP Contstraints → Constraint-File-Size
Constraint-File-Size
The file sizes of the deliverables should not exceed the limits given below.
Reason: It is hard to download big files during the practical exam due to limited WiFi bandwidth at the venue:
-
Product (i.e., the JAR/ZIP file): 100MB (Some third-party software -- e.g., Stanford NLP library, certain graphics libraries -- can cause you to exceed this limit)
-
Documents (i.e., PDF files): 15MB/file (Not following the recommended method of converting to PDF format can cause big PDF files. Another cause is using unnecessarily high resolution images for screenshots).
4 Release as a jar file Thu, Mar 25th 2359
- Do a resulting in a jar file on GitHub that can be downloaded by potential usersproper product release as described in the Developer Guide. Aim to release it by the weekly deadline. Do some manual tests to ensure the jar file works.
- Note that you can do an additional JAR release before the PE dry run if you wish, as long as you do it before 10 am Friday. That additional JAR is still considered part of v1.3 and therefore, can contain new features. When doing this additional release, do not delete the previous one (reason: it is good to preserver the release history) -- testers are expected to take the latest JAR file anyway. You may use any suitable version number for this JAR file e.g.,
v1.3.1
5 Wrap up v1.3
- as before